Choosing the right Product Stand can influence how customers notice, approach, and remember your products. It is not merely a metal frame, wooden shelf, or branded counter. It becomes part of the shopping experience. A crowded stand may hide your best items. A weak structure may look unsafe. An attractive design can still fail when staff cannot restock it quickly.
Paco Underhill, a retail behavior expert and author of Why We Buy, once said, “The easiest way to understand what people want is to watch what they do.” This principle deserves practical attention. Watch where customers stop. Notice which products they touch. Measure how long they remain near the display. Small observations can reveal more than assumptions.
A suitable Product Stand should match your product size, sales environment, customer movement, and brand identity. A cosmetics display may need bright lighting, compact shelves, and easy access. A heavy equipment stand requires stability, load capacity, and clear product information. Outdoor events demand weather-resistant materials. Store interiors may prioritize flexible layouts and clean visual lines.
There is no perfect choice.
Budget matters, but the cheapest option may create replacement costs later. A premium stand may also be unnecessary for a short campaign. The better decision comes from balancing durability, visibility, portability, safety, and maintenance. This guide explores those factors carefully. It also questions common assumptions, because a display that looks impressive in photographs may perform poorly in a real store.
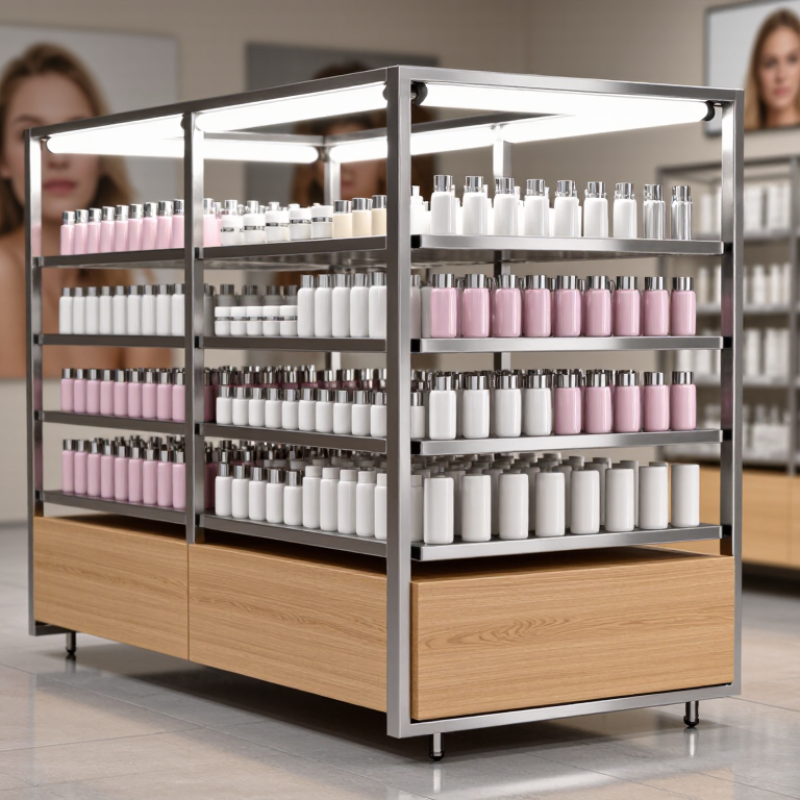
Define Display Goals Using Retail Conversion and Dwell-Time Metrics
A product stand should support measurable retail goals, not merely fill empty floor space. Start with two figures:
conversion rate
and
dwell time.
Conversion rate equals purchases divided by qualified store visits. Dwell time measures how long shoppers remain within the display zone. RetailNext’s 2024 Retail Performance Benchmark Report identifies both measures as essential for evaluating store performance. A stand that increases traffic but reduces purchases may need a clearer message.
Use a baseline before choosing the design. Record visits, interactions, dwell time, and purchases for one week. Then test height, lighting, product quantity, and sign placement. The National Retail Federation’s 2024 consumer research shows that physical stores still influence product discovery and purchase decisions. That matters. However, longer dwell time does not always mean stronger interest. Shoppers may be confused, distracted, or waiting for assistance. I have seen attractive displays lose sales because customers could not find the price.
Tips:
Place the stand near a natural pause point, not inside a narrow aisle. Keep the main product within comfortable eye level. Use one clear action, such as
“Try,”
“Compare,”
or
“Choose.”
Track results by hour and shopper type. Review the data after seven days, then adjust one element at a time. Avoid chasing a perfect number. Retail conditions change, and a useful target this month may fail during a busy season.
Match Stand Size and Load Capacity to SKU Dimensions and Weight Ratings
Choosing a product stand starts with the SKU, not the showroom floor. Measure each item’s height, width, depth, and packed weight. Include packaging, hooks, trays, and promotional attachments. A stand that fits the product visually may still fail under daily loading.
The National Retail Federation’s 2024 Consumer Returns Report estimated that 14.5% of U.S. retail sales were returned in 2023. Poorly sized displays can increase handling, damage, and customer confusion. Match shelf depth to the product footprint, leaving enough clearance for easy removal. Allow at least 10% spare width when packages vary between batches. Small details matter.
Load capacity needs practical testing. Add the weight of every SKU, then include signage and accessories. Apply a safety margin of 25% to 30%, especially for tall or frequently touched displays. The Retail Industry Leaders Association recommends using documented merchandising procedures and regular equipment checks. Record the stand’s rated capacity and test it at the busiest shelf level. Do not rely on appearance.
A 20-kilogram rating is not automatically safe.
Weight distribution also matters. Heavy items should sit low and close to the stand’s centerline. Tall products need a wider base or anti-tip support. In real stores, floors are uneven and replenishment is rushed. That is where planning becomes imperfect. Review the stand after one week, inspect bending or loosened joints, and adjust the design before adding more SKUs.
How to Choose the Right Product Stand for Your Business? - Match Stand Size and Load Capacity to SKU Dimensions and Weight Ratings
| SKU Type |
Individual SKU Dimensions
(L × W × H, cm) |
Unit Weight
(kg) |
Recommended Display Quantity
per Shelf |
Estimated Shelf Load
(kg) |
Recommended Usable Shelf Size
(W × D, cm) |
Minimum Shelf Load Rating
(kg) |
Suitable Stand Format |
| Small packaged accessories |
18 × 10 × 2 |
0.08 |
24 |
1.92 |
60 × 30 |
3 |
Countertop tray or compact tiered stand |
| Packaged snacks |
20 × 8 × 28 |
0.35 |
12 |
4.20 |
60 × 30 |
5.5 |
Three-tier countertop or floor display |
| Bottled beverages |
24 × 7 × 7 |
0.55 |
12 |
6.60 |
60 × 30 |
8.5 |
Reinforced floor stand with front retaining lip |
| Boxed dry goods |
20 × 7 × 30 |
0.45 |
10 |
4.50 |
60 × 30 |
6 |
Adjustable shelf unit with vertical dividers |
| Shoes or similarly sized footwear |
34 × 22 × 12 |
0.90 |
6 |
5.40 |
90 × 40 |
7 |
Wide slatwall shelf or low-profile floor stand |
| Small kitchen appliances |
28 × 22 × 20 |
2.20 |
3 |
6.60 |
60 × 40 |
8.5 |
Heavy-duty single-level or two-tier stand |
| Bagged pet food |
40 × 25 × 10 |
3.00 |
4 |
12.00 |
90 × 40 |
15 |
Heavy-duty pallet-style or reinforced floor stand |
| Metal paint cans |
20 × 20 × 24 |
3.50 |
4 |
14.00 |
90 × 45 |
18 |
Steel floor stand with anti-roll edge |
| Cookware sets |
38 × 30 × 18 |
4.00 |
3 |
12.00 |
90 × 45 |
15 |
Wide reinforced shelf with rear support |
Selection Notes: Estimated shelf load equals unit weight multiplied by the recommended display quantity. The minimum shelf load rating includes approximately 25% additional capacity for handling variation and uneven loading. Confirm the stand manufacturer’s rated capacity, center-of-gravity limits, anchoring requirements, and local safety regulations before installation.
Plan Floor Space Around ADA’s 36-Inch Route and 48-Inch Reach Limits
Choosing the right product stand begins with the space around it, not the stand alone. During a recent retail layout review, I measured clear paths with a tape measure after placing each display. ADA standards generally require a 36-inch minimum clear route for accessible travel. Treat that as the minimum, not the ideal. A crowded aisle may technically pass inspection yet feel difficult for wheelchair users, parents, or customers carrying bags.
Leave enough room for real movement. A stand with a wide base can reduce turning space quickly. Keep display edges, price signs, and loose cartons outside the route. Check corners carefully. They often create hidden pinch points. If customers must pass near the stand, test the path with a cart or mobility device. Store conditions can reveal problems that drawings miss.
The 48-inch reach limit also affects product height and control placement. Frequently selected items, payment controls, and essential information should remain within accessible reach. ADA guidance commonly limits unobstructed forward or side reach to 48 inches above the floor. Avoid placing key products behind deep shelves, raised lips, or bulky packaging. I once approved a display that met the height limit, but its recessed shelves made products hard to grasp. That was a poor decision. Measure the usable reach, not only the top surface, and confirm local accessibility requirements before installation.
Select Materials for Traffic Levels, Safety Standards, and Maintenance Costs
How to Choose the Right Product Stand for Your Business?
Material selection should begin with customer traffic, not appearance. A stand near a busy entrance needs strong steel, reinforced wood, or another impact-resistant structure. Lightweight materials may suit quiet corners, but they can shift when shoppers brush against them. I have seen attractive displays loosen after repeated contact. That mistake was costly and avoidable. Check the stand’s load rating, stability, and joint quality before placing products on it.
Tips
Measure the busiest hour, not the average day. Choose rounded edges for narrow aisles and secure shelves against tipping. Ask suppliers for material specifications, fire-resistance information, and applicable safety documentation. Requirements differ by location, so verify local retail and workplace standards. Do not assume a “heavy-duty” label proves compliance.
Maintenance costs also depend on the material’s surface. Powder-coated metal usually handles frequent cleaning well, while untreated wood may absorb moisture and show marks quickly. Acrylic can look bright, but scratches become visible under strong store lighting. For food, healthcare, or high-touch environments, select non-porous surfaces that tolerate approved cleaning agents. Test a small hidden area first. I once chose a finish that looked practical, yet fingerprints appeared within minutes. A cheaper stand can demand more labor, replacement parts, and downtime over time. Consider cleaning schedules, spare components, and seasonal storage before approving the final design.
How to Choose the Right Product Stand for Your Business?
Estimated annual maintenance cost for a 10 m² product display area, compared across common stand materials.
High-traffic areas
Powder-coated steel is usually the most suitable option because of its high load capacity, rigidity, and resistance to repeated impact.
Safety standards
Specify stable bases, rounded or protected edges, suitable load ratings, and documented fire-performance requirements where applicable.
Maintenance planning
Aluminum generally offers low upkeep, while acrylic and wood may require more frequent cleaning, refinishing, or replacement of damaged parts.
Figures are planning benchmarks in USD for routine cleaning, minor repairs, surface treatment, and replacement of small components. Actual costs vary by traffic, environment, construction quality, and local labor rates.
Compare Stand Options by Cost per Displayed SKU and 12-Month ROI
How to Choose the Right Product Stand for Your Business?
A product stand should be judged by cost per displayed SKU, not purchase price alone. Divide the stand’s total twelve-month cost by the average number of visible SKUs. Include freight, assembly, floor space, cleaning, replenishment time, and expected replacement costs. A $900 stand displaying 30 SKUs costs $30 per SKU before labor. A $1,200 unit displaying 60 SKUs costs $20. Capacity matters.
The U.S. Census Bureau reported that e-commerce represented 16.1% of total retail sales in 2024. Physical displays must therefore earn attention quickly, especially when shoppers can compare prices instantly. Track sales before installation, then measure unit sales, gross profit, and stock movement for twelve months. A simple ROI formula is: (incremental gross profit minus stand cost and operating costs) divided by total investment. The National Retail Federation reported that retail returns reached 14.5% of sales in 2023. Poor product presentation can add avoidable margin pressure.
Use a QR code or staff feedback to identify assisted purchases. Record weekly SKU performance. Small details matter. My first forecast is often too optimistic. Foot traffic may rise, while conversion stays flat. Recheck the result after seasonal peaks, not only after launch. A stand with lower upfront cost may produce weaker twelve-month ROI if it hides products, blocks access, or requires daily labor. Test one location before expanding.
FAQS
Track conversion rate and dwell time. Conversion rate equals purchases divided by qualified store visits. Dwell time measures time spent near the display. More time does not always mean stronger interest.
Record visits, interactions, dwell time, and purchases for one week. Note results by hour and shopper type. This provides a practical comparison point. One week may still miss seasonal patterns.
Test display height, lighting, product quantity, and sign placement. Change one element at a time. Review results after seven days. Otherwise, you may not know what caused improvement.
Place it near a natural pause point. Avoid narrow aisles and busy turning areas. Keep the main product near comfortable eye level. Make the action obvious, such as “Try” or “Compare.”
Customers may stop because they feel confused. A missing or hidden price can interrupt a purchase. Keep pricing visible from the customer’s approach. Attractive design cannot fix unclear information.
Maintain at least a 36-inch clear route where accessibility standards require it. Treat this as a minimum, not a comfortable target. Test movement with a cart or mobility device. Drawings can miss real obstacles.
Frequently selected products and essential controls should remain within accessible reach. A common guidance limit is 48 inches above the floor. Check the usable reach, not just the shelf height. Deep shelves can make compliant measurements feel unusable.
Check wide bases, display edges, signs, cartons, and corners. Corners often create hidden pinch points. Bags and carts need turning space too. I once approved a recessed shelf that was difficult to grasp. That decision needed more reflection.
No target stays reliable forever. Store traffic, seasons, and shopper behavior can change quickly. Adjust based on current evidence. A useful target this month may fail during a busy period.
Conclusion
Choosing the right Product Stand starts with clear, measurable display goals. Evaluate how the stand can improve retail conversion, attract attention, and increase customer dwell time. Its size and load capacity should match the dimensions, quantity, and weight of the products it will hold, preventing overcrowding or instability. Careful floor planning is also essential, with enough space to maintain an accessible 36-inch route and accommodate 48-inch reach limits.
Material selection should reflect expected traffic levels, safety requirements, durability, and ongoing maintenance costs. High-traffic environments may require stronger, easier-to-clean materials, while quieter spaces may benefit from lighter and more flexible options. Finally, compare different stands by calculating the cost per displayed SKU and estimating the expected 12-month return on investment. A well-chosen stand should balance functionality, safety, appearance, and long-term value while supporting efficient product presentation.

 Hotter Commercial Equipment